Introduction
You know what’s wild? A newborn session might look soft and serene on the outside—tiny fingers, sleepy yawns, delicate wraps—but behind the lens, it’s all about precision and composition. That’s right, composition for posing techniques with a newborn isn’t just a fancy phrase; it’s the heartbeat of every meaningful image I create.
As a newborn and maternity photographer here at Artin Photography in Port Moody, I’ve spent years understanding how composition can transform a photo from just “adorable” to absolutely unforgettable. It’s more than just positioning a baby on a blanket. It’s storytelling. It’s balance. It’s emotion—crafted with light, angles, framing, and yes, sometimes the tiniest toe placement.
Why Composition Matters in Newborn Photography
Let me tell you—newborn photography is as much about instinct as it is about artistry. But here’s the thing: instinct needs structure. And good composition gives that structure its soul.
You’ve probably seen it too. Some baby photos just hit differently, right? That’s usually because the photographer understood the power of leading lines, negative space, and the rule of thirds. These aren’t just buzzwords—they’re the invisible threads that guide the viewer’s eyes, highlight emotion, and create a soothing rhythm in the image.
Did you know? According to a study published by Psychology Today, our brains are naturally drawn to balanced, symmetrical visuals, especially in portraiture. That’s why thoughtful composition feels so “right” when you look at a well-posed newborn shot. It speaks a visual language we don’t even know we’re fluent in.
The Art of Posing: Creating Emotion and Connection
But here’s where it gets really special. While composition is your map, posing is the heartbeat. The way a newborn curls into a soft wrap, the gentle curve of their arm, the slight tilt of the head—it all builds a connection between subject and viewer. And when I pair that emotion with strong compositional techniques, something magic happens.
This is where I get to infuse storytelling into every frame. Whether I’m photographing a firstborn wrapped in grandma’s heirloom shawl, or capturing the tender bond between a newborn and their older sibling—my goal is always the same: to honor your family’s story.
That’s the magic of what I do here in Port Moody—and why I’m so passionate about blending professional skill with real, raw emotion. So if you’re an expecting parent or a new mama wondering how these peaceful, powerful images are made… stick with me. We’re just getting started.
The Importance of Composition and Posing Techniques for Newborn Photography
Mastering composition and posing techniques for newborn photography is essential for creating visually balanced, emotionally engaging images. These techniques guide the viewer’s attention to the baby’s most delicate features while maintaining harmony in the frame. When used thoughtfully, they help transform simple newborn portraits into timeless pieces filled with warmth, connection, and intentional beauty.
Understanding Composition in Newborn Photography
What is Composition? A Simple Breakdown 🧩
As a newborn photographer, I think of composition like the secret sauce. It’s what turns a technically “okay” photo into something that gives you goosebumps. In simple terms, composition is how all the elements in an image are arranged within the frame—your baby, the props, the background, even the negative space.
Imagine you’re decorating a nursery. You wouldn’t just toss things around randomly—you’d place each item where it feels right. That’s composition. And in newborn photography, every angle, every fold of a wrap, and every shadow is placed with purpose.
Here’s a quick breakdown of some of the core compositional elements I use in my sessions:
| Element | What It Does | How I Use It with Newborns |
|---|---|---|
| Rule of Thirds | Creates balance and natural focus | I align baby’s face or eyes along the grid lines |
| Leading Lines | Guides the viewer’s eye toward the subject | Curves of blankets or arms subtly draw you in |
| Framing | Highlights the subject by surrounding them | Using wraps, hands, or crib edges for soft frames |
| Negative Space | Emphasizes subject by leaving breathing room | Blankets, light backgrounds, or shadows |
| Symmetry & Balance | Makes the image feel calm and harmonious | Baby curled in center with equal visual weight |
📸 “Composition is the silent storyteller of every portrait.”
The Role of Composition in Capturing Timeless Newborn Portraits
Here’s the truth: babies change fast. I mean lightning-fast. Their tiny features, sleepy smiles, and wrinkly feet—gone in the blink of an eye. That’s why composition for posing techniques with a newborn is so much more than just “lining things up.”
It’s how I help you freeze a feeling.
When I create a photo that balances softness and structure, emotion and elegance—it’s because the composition is doing a lot of the heavy lifting behind the scenes. It directs focus to what matters most: your baby. Not the background, not the props (though those are fun!), but your child’s story in that exact moment.
Let me give you a quick example:
➡️ When I place your baby’s face on the top third of the frame, with soft blankets trailing diagonally—your eye naturally follows the flow. It’s soothing. It feels right. That’s no accident. That’s composition doing its job.
🎯 What Composition Helps Me Achieve in Every Newborn Portrait:
- Emotional connection between baby and viewer
- A sense of peace and timelessness
- Focus on natural beauty and cultural elements
- A clear, uncluttered story within the frame
- Visual flow that feels intuitive and gentle
Honestly? I don’t just want to take pictures of your baby—I want to create portraits you’ll still love twenty years from now. And that starts with understanding the language of visual harmony. Composition is that language. It speaks through balance, flow, and heart.
So the next time you scroll through baby photos and something just feels right, know this: it’s probably not random. It’s composition, whispering to your heart. 💛
Up next, I’ll share how I use the Rule of Thirds and other techniques in real sessions here in our cozy Port Moody studio… and how those small decisions make a huge difference.
Mastering the Rule of Thirds for Newborn Posing
How the Rule of Thirds Enhances Your Images
Okay, let’s get into the nitty-gritty—because this one’s a game-changer. The rule of thirds is one of those photography basics that sounds technical but feels natural once you see it in action. As a newborn photographer, I lean on this rule constantly, especially during those calm, sleepy baby moments when everything feels soft and still.
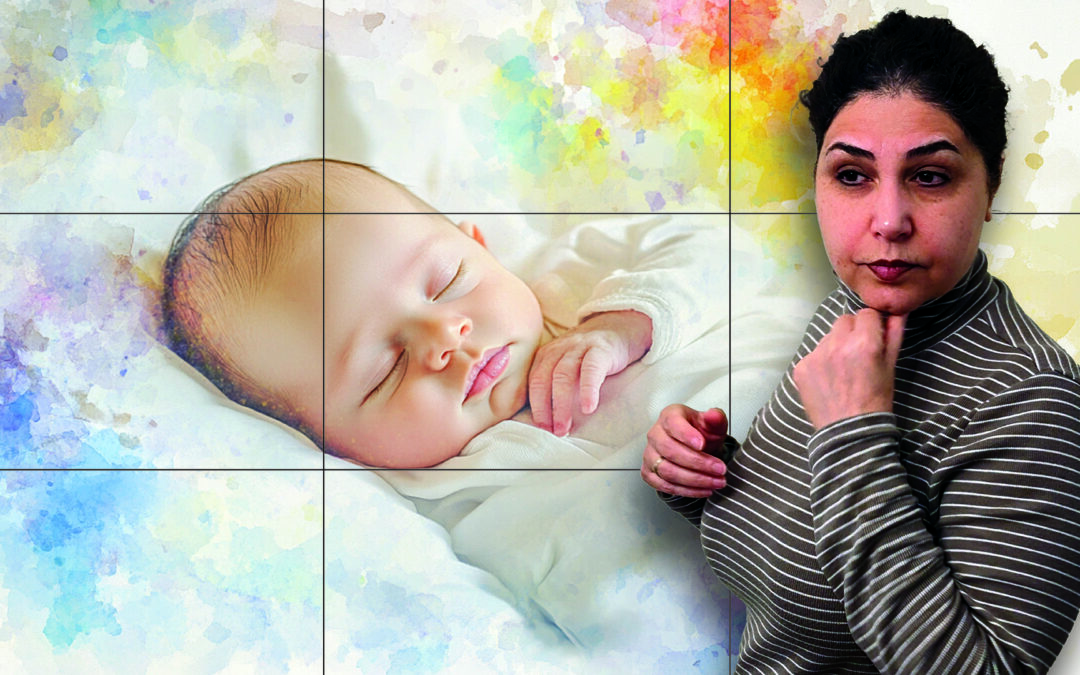
📐 Think of your image as being divided into nine equal parts—two horizontal and two vertical lines forming a grid. The sweet spots? Where those lines intersect. That’s where our eyes naturally go.
So when I place your baby’s eyes or hands near those intersections, it draws attention exactly where it should be. It’s subtle, but oh-so-effective.
Here’s a quick visual breakdown:
| Positioning Trick | Why It Works |
|---|---|
| Baby’s face on top-left intersection | Leads the eye, creates an intimate focal point |
| Head and body aligned along vertical third | Adds flow and grace to full-body baby portraits |
| Props on opposite third | Balances the image without stealing the spotlight |
🔍 “The magic isn’t always in the center—it’s in the thirds.”
Practical Ways to Apply the Rule of Thirds in Newborn Photography
Now, in theory this sounds easy… but what about in real, wriggly-baby, milk-drunk reality? I’ve got you. Let me walk you through how I make this rule work in my Port Moody studio—without making it feel stiff or staged.
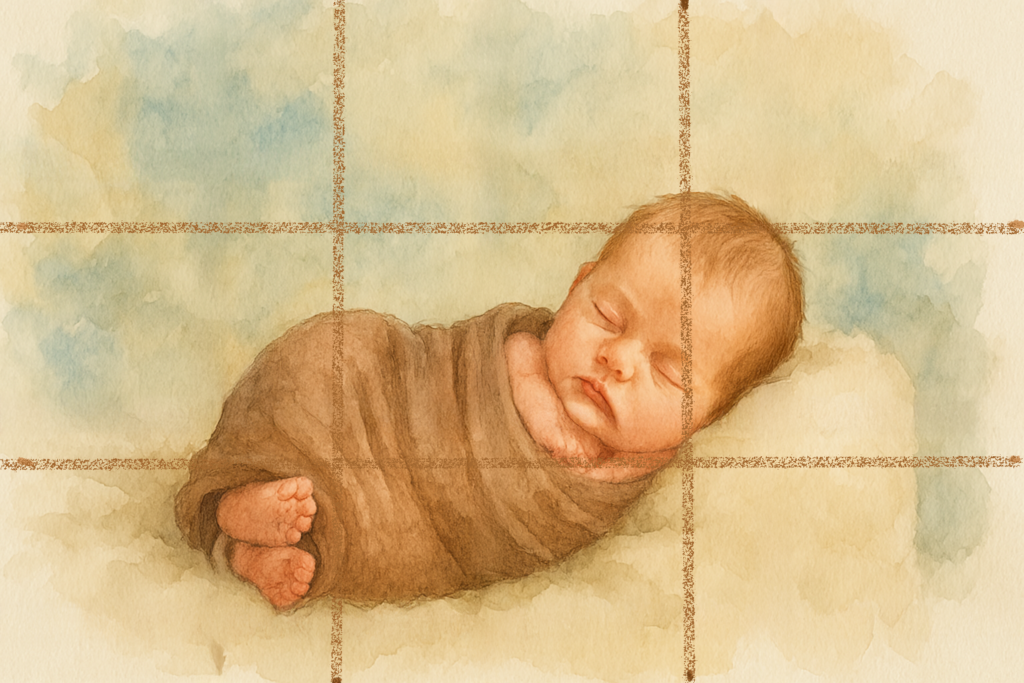
👣 Side Lying Pose
I love this one. When baby is lying on their side, I position their head near the upper-left third of the frame, with their tiny toes stretching toward the lower third. It creates a soft diagonal that’s just so pleasing to the eye.
🧺 Wrapped in a Basket Pose
Using a round prop like a bowl or basket? I still use the rule. I place the center of the prop slightly off-center—right along a third line—and it balances the baby with any surrounding textures like florals or wraps.
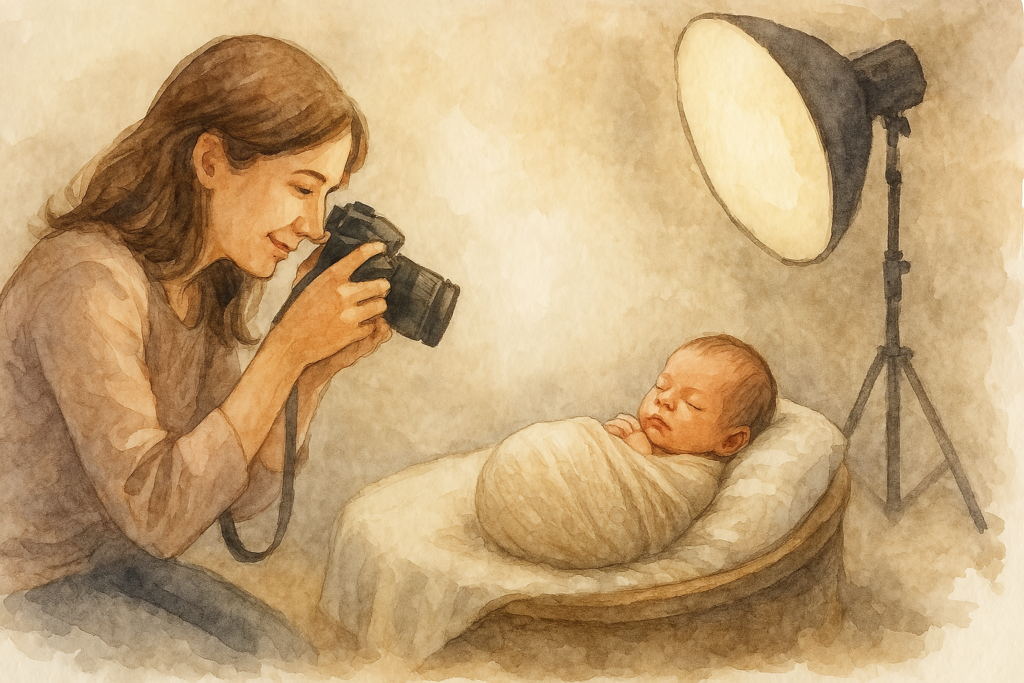
📷 Parent Hands + Baby Pose
Hands create natural framing (win!) and placing baby’s head where the lines intersect brings the viewer’s focus right to their expression. Even if their eyes are closed, you feel the connection.
🎨 My Secret Tip: I use the gridlines on my camera screen while shooting. Yep—no shame in using the tools! Most DSLR and mirrorless cameras (and even phones) let you turn on a composition grid. It helps keep things balanced in real time so I can focus on what really matters: emotion.
💡 Why Parents Love This Look
I’ve had so many moms and dads tell me, “I don’t know what it is, but this photo just feels perfect.” That’s the rule of thirds in action. You don’t need to understand it to feel it. That’s the beauty.
And if you’re booking a newborn session, that emotional pull? It’s what makes your gallery feel timeless—like it belongs on a wall, not just a phone.
👉 Up next, we’ll talk about framing techniques—because how you surround the baby in your image is just as important as where you place them. This is where props, textures, and soft shadows come into play. Let’s go make some visual poetry.
Framing Techniques to Add Depth and Focus
Using Props and Backgrounds to Frame Your Subject
Let’s be real—props can be adorable. But used intentionally, they become way more than cute accessories. They become framing tools. In newborn photography, framing helps draw attention right where it belongs: on your baby’s face, eyes, or delicate features. It creates depth, adds visual structure, and gently guides the viewer’s eye—without feeling forced or busy.
As a newborn photographer, I always ask myself: What’s supporting the story here? Because I’m not just putting a baby in a basket—I’m placing your little one inside a soft, cozy frame that makes their peaceful expression the true centerpiece.
🧺 Here are some of my go-to framing tools in the studio:
- Wraps and swaddles — I loosely wrap around baby’s body, leaving the face framed with texture
- Florals or foliage — Arranged around the edges of a basket to create a soft, natural halo
- Rings or bowls — Provide natural circular frames that echo the curl of the newborn’s posture
- Blankets or flokati textures — Pulled in to softly shape the corners of the frame
📸 Pro tip: I often use wraps in muted, earthy tones so they don’t overpower the baby—they complement, not compete.
How to Create a Natural Frame with Hands and Fabrics 🤲
Sometimes the most powerful frame is the most simple. I’m talking about hands—your hands.
There’s something emotionally magnetic about a parent holding their baby. But beyond the sentiment, a well-placed hand can create a gentle, natural frame around your baby’s face or body. It adds intimacy, scale, and a quiet kind of strength.
💡 Here’s how I use hands and fabrics to build emotional framing:
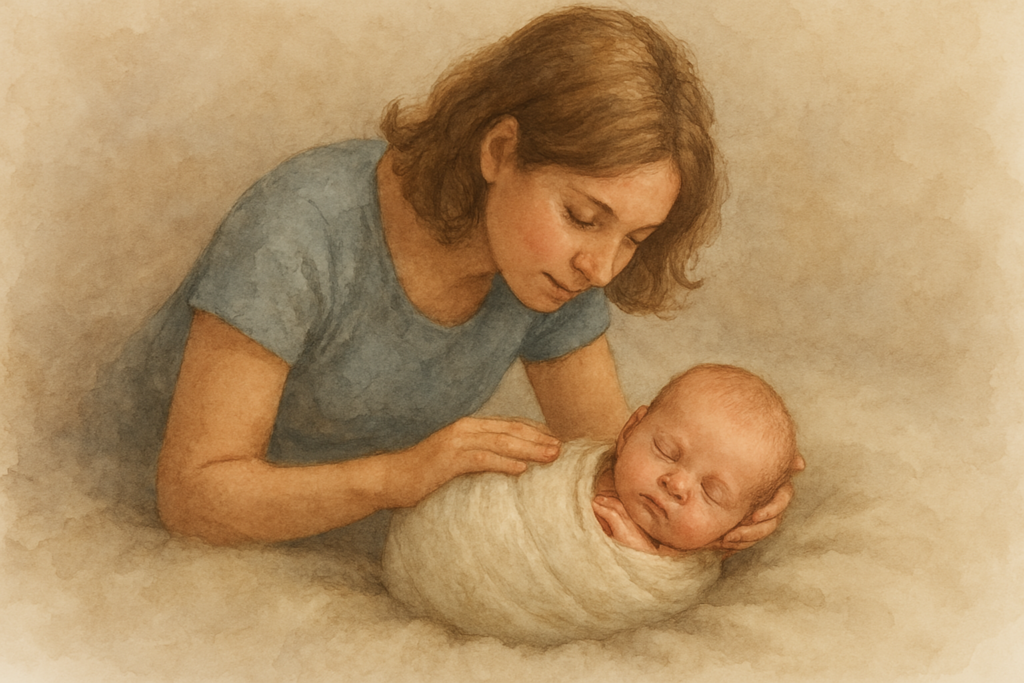
- Mom or Dad’s hands cupping baby’s head – creates a loving frame around the face
- Older sibling’s arms gently cradling baby – adds storytelling and balance to the composition
- Layered muslin cloths – softly frame the baby’s body, guiding the eye inward
- A parent’s silhouette blurred in the background – creates depth and tells a quiet story of protection
🧠 Framing doesn’t just make the photo look nice—it makes it feel like something. And when done right, it adds a layer of emotion that goes far beyond technical skill.
🎨 Visual Framing Example
Here’s how I think when I’m setting up a shot:
| Frame Element | Visual Effect | Emotional Cue |
|---|---|---|
| Soft wrap framing | Adds contrast and focus | Coziness, safety |
| Circular prop | Creates visual repetition and balance | Womb-like comfort, harmony |
| Parent’s arms | Frame baby naturally | Connection, tenderness |
| Shadows and light | Frame through contrast | Drama, intimacy |
So next time you look at a beautifully framed newborn portrait, notice how your eyes settle. That calm, centered feeling? That’s not an accident. That’s thoughtful framing—turning a photograph into a feeling.
And here in my cozy Port Moody studio, that’s always the goal: not just pictures, but portraits that feel like home.
👉 Up next: Leading lines—those invisible pathways that pull you into the image and keep your eyes dancing. Trust me, you’re gonna love this one.
Leading Lines: Guiding the Viewer’s Eye to the Baby
How to Use Blankets, Wraps, and Limbs to Create Lines
Ever notice how some photos just pull you in? Like your eyes instantly find what matters, and then linger there for a moment? That’s the magic of leading lines—one of my absolute favorite composition tools when I’m posing a newborn.
As a photographer, I use leading lines to guide the viewer’s eye right where I want it to go—usually to the baby’s face, eyes, or tiny hands. The best part? These lines can be soft, subtle, and completely natural. They’re built into the curves of a wrap, the folds of a blanket, or even the position of your baby’s arms and legs.
Let me give you a few real examples from my sessions here in Port Moody:
🧷 Swaddled Wrap Lines
When wrapping baby snugly, I let the folds of the fabric spiral toward the center of the frame—usually leading straight to the baby’s face. It’s gentle, but incredibly effective.
🛏️ Blanket Folds and Fur Textures
Soft layers or textured backdrops can create curved or diagonal lines. I arrange them carefully so they pull your gaze inward, like a visual hug around your little one.
🦶 Limbs and Body Curves
The way a baby’s arms are tucked under their chin, or how their little legs curl up into a womb-like pose—these shapes create organic lines that naturally point to the center of attention.
🧡 Real Tip from My Studio:
I often shoot from above or at a slight angle to exaggerate these lines. Sometimes just tilting my camera 5 degrees makes all the difference in drawing the viewer in.
Directing Attention to the Baby’s Face with Strategic Placement 🎯
Newborns are tiny. That’s part of the magic, right? But that also means in a full frame, they can get visually lost if you don’t guide the eye. That’s where composition for posing techniques with a newborn really becomes an art form.
By arranging wraps, props, or body angles to point inward, I can create what we call visual flow. It’s like giving the viewer a soft, subtle map that leads straight to the baby’s most expressive feature—their face.
Here’s how I plan it:
| Leading Line Source | Where It Guides the Eye | Visual Result |
|---|---|---|
| Curved wrap lines | Toward baby’s face or hands | Soft, cozy energy |
| Diagonal limbs | Across the frame into the eyes | Movement and flow |
| Blanket folds or edges | Toward center of composition | Balance and subtle emphasis |
| Parent’s arms or hands | Cradling shape toward baby’s head | Emotional grounding and intimacy |
👁️🗨️ Think of leading lines like whispers. They’re subtle, but they tell your eyes exactly where to look—without ever saying a word.
Why This Matters in Real Life (Not Just on Instagram)
I’m not just composing for aesthetics. I’m composing for emotion. You’re going to hang these portraits in your hallway, gift them to grandparents, maybe even use them in baby announcements. And when people see them, I want their eyes to land exactly where the story is strongest: on your baby’s gentle expression.
That’s why leading lines are part of every session I shoot—from cozy newborn snuggles to sibling portraits where I use a big brother’s gaze as a visual guide.
Here in our cozy Port Moody studio, I’m always thinking like this. Every wrap placement, every blanket fold, every tiny arm position—it all matters. Because these portraits aren’t just about what you see… they’re about what you feel.
📸 Next, let’s talk about negative space—why sometimes, leaving room to breathe in an image is the most powerful choice of all.
The Power of Negative Space in Newborn Photography
Why Less is More: Creating Minimalist, Impactful Images
You know that feeling when you walk into a quiet room and instantly breathe easier? That’s what negative space does in photography—it gives your eyes and heart room to exhale.
As a newborn photographer, I’ve learned that sometimes, the most powerful part of a photo is actually… what’s not there. Negative space is the empty or “quiet” area around your subject. And when I use it thoughtfully, it can turn a sweet newborn photo into something that feels sacred.
🎈 Think of it this way: when everything else steps back, your baby steps forward. Their little features, soft expressions, or peaceful sleeping face become the undeniable focal point. There’s no noise. No distractions. Just connection.
Best Backgrounds for Effective Negative Space 🎨
When I plan a session in my Port Moody studio, I think ahead about how to use the environment to create calm, clean compositions. The backdrop, lighting, and positioning all play a role in allowing negative space to shine.
Here are a few of my favorite go-to setups for that magical, minimalist feel:
🧼 Creamy Neutrals
Beige, ivory, warm whites—they make skin tones glow and let baby be the star. These tones whisper in the background, never shout.
🖤 Deep Charcoal or Soft Black
Dark backgrounds add mood and contrast. They make every tiny feature pop—especially when I use side lighting to sculpt shadows just right.
🌫️ Soft Blur with Shallow Depth of Field
By shooting with a wide aperture (hello, dreamy bokeh!), I blur the background and subtly surround the baby in visual quiet.
🧺 Simple Setups
A single wrap, a soft pillow, and a well-placed light source. That’s often all it takes. The key is restraint—it’s knowing when not to add more.
📷 Quick Glance: My Negative Space Toolkit
| Technique | Why I Use It | Emotional Effect |
|---|---|---|
| Neutral backgrounds | Clean, timeless feel | Calm, softness |
| Wide camera angles | Adds air around the subject | Emphasizes how small and new baby is |
| Centered baby in empty space | Pulls focus entirely to the baby | Serenity, purity |
| Off-center placement with space | Creates curiosity and flow | Artistic, modern |
🧠 Here’s something interesting: Studies show that minimalist images tend to hold viewer attention longer. It’s true! With less visual noise, our brains spend more time soaking in the details—like the curve of a cheek, the tiny lips, or the way a hand curls near the ear.
And when you’re photographing something as fleeting and tender as a newborn, every little detail matters.
What Parents Say About These Images ❤️
I’ve had so many moms say, “This one just feels… peaceful.” That’s negative space doing its job. It lets the emotion breathe. It doesn’t crowd the frame. It gives your baby’s story a soft place to land.
Whether we’re photographing your baby wrapped like a little burrito or peacefully sleeping on a textured blanket, I always look for ways to let the frame “breathe.” Because that’s how we turn a simple photo into something that feels eternal.
And here, nestled in my cozy little Port Moody studio, it’s that quiet beauty I chase every single time.
📌 Coming up next: Balance and Symmetry—how I use compositional harmony to create photos that feel as stable and beautiful as your growing family.
Achieving Balance and Symmetry in Your Poses
How to Arrange Baby’s Body for a Harmonious Composition ⚖️
Let me tell you something I’ve learned after years of working with tiny humans: babies don’t pose themselves—but when placed just right, they radiate the kind of calm that feels like poetry. And one of the biggest secrets behind that feeling is balance and symmetry.
As a newborn photographer, I think of balance the way a musician might think of rhythm. It’s not always about making everything perfectly even—it’s about creating a visual “beat” that flows smoothly through the frame. And when I get that rhythm right, the result is an image that feels effortless… even though there’s a lot of care behind the scenes.
📏 Symmetry, on the other hand, taps into something primal. Our brains love it. Studies in visual psychology have shown that humans are drawn to symmetrical patterns because they feel stable and trustworthy. That’s why centering your baby in a soft, symmetrical pose often leads to the photos that parents treasure most.
Here’s how I build that harmony:
🛏️ The Froggy Pose
Baby’s chin rests on their tiny hands, legs tucked under—everything balanced in the center. It’s serene, structured, and full of personality.
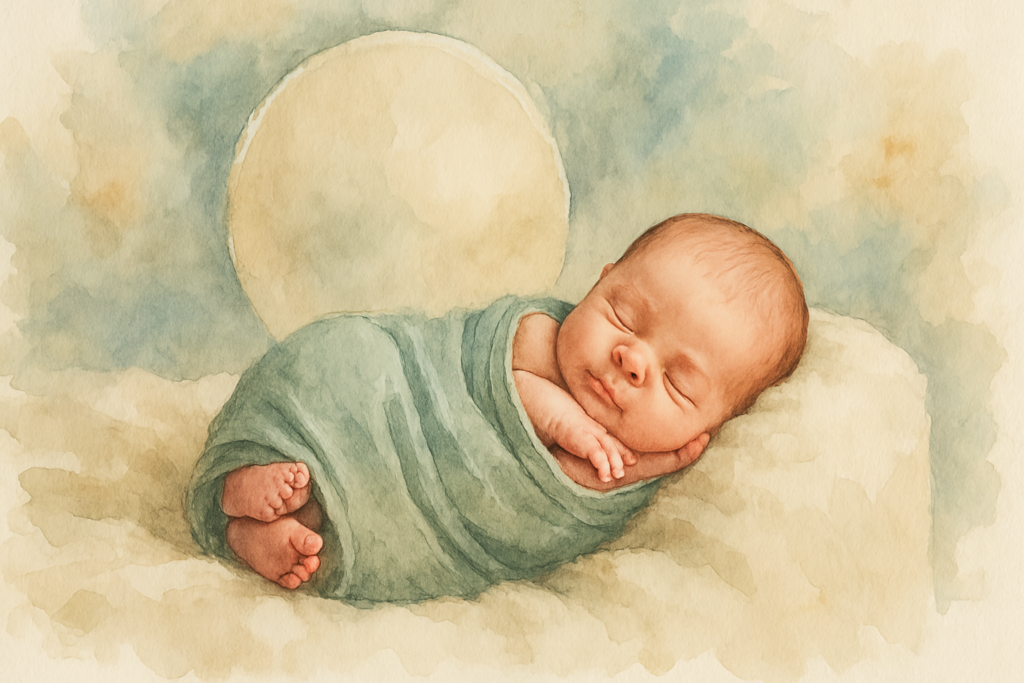
🌙 The Taco Pose
(Yes, that’s what we call it!) Baby’s feet come up close to their head in a gentle curve. I position the curve evenly across the frame to create circular harmony.
🧺 Wrapped Basket Pose
When baby is snug in a round basket, I place their head at the center and let the wrap and limbs fan out in balanced directions—like petals.
Using Props and Accessories Without Overwhelming the Frame 🎀
Look, I love a sweet little bonnet or a knitted teddy as much as anyone. But the key? They should support the story—not steal the spotlight. Over-accessorizing can throw off your composition and make the image feel cluttered instead of calm.
So when I choose props or accessories in my Port Moody studio, I always ask myself:
💬 “Does this add harmony? Or is it just noise?”
💡 Here’s how I use props with balance in mind:
- Stick to a color palette: Usually soft neutrals, earthy tones, or warm pastels that complement baby’s skin
- Use symmetry with support props: If there’s a pillow under one side of baby, match the angle on the other for balance
- Repeat shapes or textures: A knitted blanket with a knitted bonnet creates cohesion
- Limit visual competition: One focal point—usually the baby’s face—should always be the star
📷 Visual Guide: Balanced Posing Elements
| Element | What It Balances | Why It Works |
|---|---|---|
| Even limb placement | Body symmetry | Soothing and familiar to the eye |
| Mirrored wrap folds | Background texture | Adds rhythm and flow |
| Centered light source | Visual weight | Keeps focus on baby’s features |
| Matched tones in props | Color harmony | Avoids visual distraction |
Why Balance Brings Emotion into Focus
Here’s something I think about often: a well-balanced photo doesn’t just “look” good—it feels safe. It gives parents a sense of calm, connection, and completeness. And when they see their baby nestled into that kind of harmony, it speaks volumes without saying a word.
One mom once told me, “This photo feels like a lullaby.” That’s when I knew I’d done my job—not just technically, but emotionally.
So whether it’s a simple, centered portrait or a wrapped pose with just the right tilt of the head, my goal is always the same: to create images that feel as balanced and beautiful as the love behind them.
Next up, let’s explore something dreamy—depth of field—and how a little blur can bring sharp, stunning focus right where it counts.
Playing with Depth of Field for Soft, Dreamy Newborn Photos
How Aperture Affects the Feel of Your Image 🎯
Alright—let’s talk blur. You know those buttery-soft backgrounds that make the baby’s face pop like a dream? That effect is created by controlling something called depth of field, and it’s one of my absolute favorite tools in newborn photography.
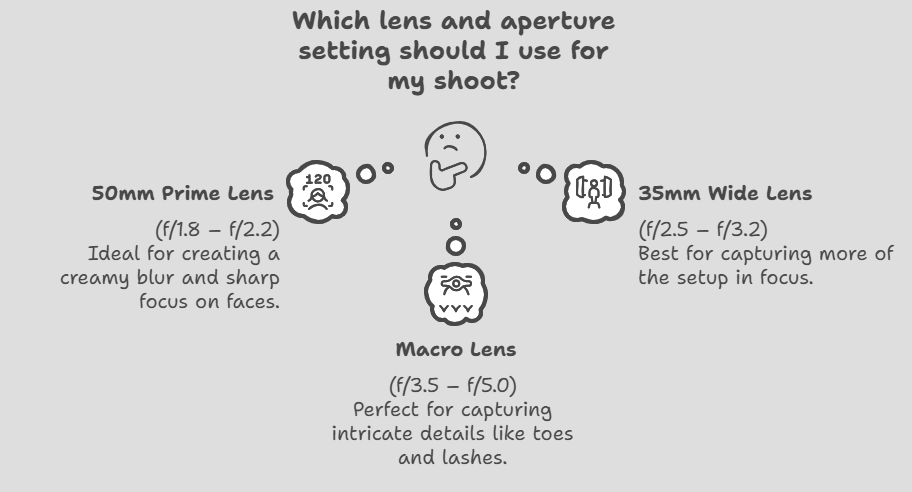
As a photographer, I adjust my aperture (a setting on my lens) to control how much of the image is in sharp focus versus how much melts into a blur. A wide aperture (like f/1.8 or f/2.2) creates that shallow depth of field—perfect for isolating baby’s delicate features and giving everything else a soft, gentle backdrop.
👶✨ Why it works so well for newborns?
Because babies are tiny. Their faces are expressive, even when sleeping. That little squish in their cheeks or the faint lashes on their lids—that’s what you want to highlight. A shallow depth of field helps me do exactly that—focus on the magic while softening the rest.
📷 Depth of Field Cheat Sheet: My Typical Settings in Studio
| Lens Type | Aperture Setting | Why I Use It |
|---|---|---|
| 50mm prime | f/1.8 – f/2.2 | Creamy blur, sharp baby face |
| 35mm wide lens | f/2.5 – f/3.2 | More of the setup in focus |
| Macro lens (details) | f/3.5 – f/5.0 | Captures toes, fingers, lashes |
💡 Pro tip: Even with shallow focus, I make sure baby’s eyes, nose, and lips fall within the sharpest zone. That’s where all the soul lives—even if their eyes are closed.
The Best Lenses for Capturing Depth and Detail 🔍
Over the years, I’ve tried nearly every lens out there, and I keep coming back to a few trusty favorites that give me that dreamy, signature look. If you’re curious (and I know some of you are!), here’s what I reach for in my Port Moody studio:
- Canon RF 50mm f/1.2 – My ride or die. Incredibly sharp, gorgeous fall-off in focus, and perfect for both close-ups and full-body shots.
- Sigma 35mm f/1.4 Art – Great for showing a bit more of the scene without losing that shallow depth feel. Awesome for sibling shots or lifestyle frames.
- Canon RF 85mm f/2 Macro – Hello, baby eyelashes. I use this for those close-up storytelling shots—tiny hands holding a parent’s finger, sweet lips, tiny toes.
📸 “The lens sees what the heart feels—soft where it needs to be, sharp where it matters.”
Why Depth of Field Adds That Magical, Timeless Touch
Have you ever looked at a photo and just felt the softness? Like, your whole body relaxes for a second? That’s depth of field working its subtle magic.
It’s not about the blur itself—it’s about what that blur says. It whispers, This moment is quiet. This moment is gentle. This is love.
When I use shallow focus in your session, it’s not just a stylistic choice. It’s a way of honoring how fleeting and precious this stage is. Your baby won’t stay this tiny forever. But through the softness of selective focus, I can help you remember the peaceful weight of those early days—forever frozen in time.
And now, let’s talk about one of the most misunderstood but hugely powerful tools in composition—lighting. Because without the right light, even the best pose and lens can fall flat. Ready to glow? Let’s go. ☀️📸
The Role of Lighting in Composition and Posing
Soft Natural Light vs. Studio Light: What Works Best? ☀️💡
Let me say this upfront: light is everything. It’s not just about visibility—it’s about emotion. The way light wraps around your baby’s cheeks, the gentle shadows that hug their tiny nose, the glow that highlights a curl of hair… that’s where the magic lives.
In newborn photography, lighting does more than just brighten an image. It shapes the mood, enhances composition, and guides the viewer’s eye—just like a painter uses brushstrokes to direct attention.
Now, you might be wondering: What kind of light do you use, Mary?
Here in my cozy Port Moody studio, I use a blend of both natural light and studio lighting, depending on the mood we’re creating and the time of day.
Let’s break it down:
| Lighting Type | Why I Use It | The Mood It Creates |
|---|---|---|
| Natural Light | Soft, diffused through sheer curtains | Gentle, airy, organic |
| Studio Softbox | Consistent and fully controllable | Smooth, warm, dreamy |
| Backlight or Rim Light | Adds glow around baby’s outline | Ethereal, halo-like effect |
| Side Lighting | Adds dimension and gentle shadows | Sculptural, dramatic, elegant |
🌥️ On cloudy days, natural light acts like a massive softbox—and honestly, some of my favorite sessions have happened when the skies are gray.
But when the weather isn’t cooperating (and hey, it’s the Lower Mainland—rain happens!), my studio lighting steps in with a warm, cozy glow that looks and feels just like daylight.
How Shadows and Highlights Enhance Composition 🌗
Shadows aren’t the enemy. In fact, they’re one of the best compositional tools in my toolbox. With thoughtful lighting, I can use shadows to sculpt shape, define space, and direct the eye exactly where I want it to go.
Think about this: when a baby’s tiny nose casts the faintest shadow onto their cheek, it gives the image depth. It’s not just a flat photo anymore—it has dimension, softness, and soul.
Here’s how I use light and shadow as part of my posing strategy:
- Light from above and slightly to the side helps highlight baby’s face while gently shadowing the body for depth.
- Feathered lighting (where the edge of the light hits the subject) adds softness to wraps, blankets, and background elements—allowing the baby’s features to stand out.
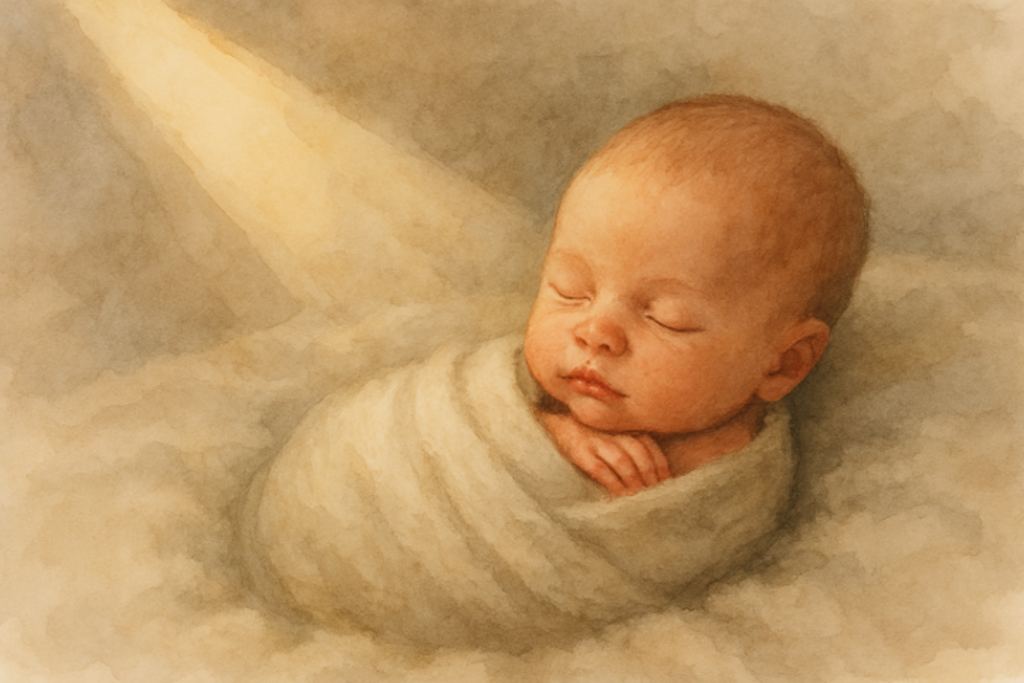
- Backlighting adds that dreamy glow around baby’s hair or edges of the wrap, making them feel like they’re floating in light.
📸 “Light reveals form. Shadow gives it character.” I live by that.
Lighting That Keeps Baby Safe and Cozy 🧸
One thing I’ll never compromise on? Comfort and safety.
The lighting I use is soft, indirect, and baby-safe. I avoid harsh flashes or heat-producing lamps. Whether it’s natural window light or a carefully diffused softbox, my setup is designed to keep your baby comfortable, calm, and cozy—which, let’s be honest, makes for much smoother posing and much happier parents.
💬 What Parents Say
One mom recently told me, “I don’t know how you made her skin look like it was glowing from the inside.” My secret? Thoughtful lighting, carefully placed shadows, and a whole lot of love.
Whether we’re going for a light and airy vibe or a more dramatic, fine-art look, lighting is what ties everything together—posing, composition, mood, and memory.
Next up, let’s talk about something close to every parent’s heart (and mine too): safety and comfort. Because no matter how beautiful the photo, it’s never worth it if baby isn’t safe, happy, and fully supported every step of the way. 💛
Safe and Comfortable Posing While Maintaining Composition
Essential Safety Guidelines for Newborn Posing 👶🔒
Here’s the truth I always come back to—no photo is worth risking a baby’s safety. I’ve built my entire approach to newborn photography around that principle. Every pose, every prop, every compositional decision starts with one question: Is this 100% safe and comfortable for the baby?
Because let’s be honest—newborns are fragile, unpredictable, and completely dependent on us. They can’t say, “Hey, this pose isn’t working for me.” So it’s my job to know their limits, watch their cues, and prioritize their well-being in every single frame.
In my Port Moody studio, I follow strict safety protocols to ensure your baby is protected, soothed, and supported at all times. That means:
✅ Spotters or hands-on support for certain poses
✅ Soft, sanitized, baby-safe props and materials
✅ Constant temperature control (warm and cozy always!)
✅ Frequent breaks for feeding, changing, and cuddles
✅ Never forcing a pose—if baby says no, we pivot
📸 “If the baby isn’t calm and happy, the shot doesn’t happen. It’s that simple.”
Keeping the Baby Relaxed While Perfecting Your Composition 🌿
Now, here’s the beautiful balance I strive for: a perfectly composed image where the baby looks completely at peace. That takes more than technical skill—it takes patience, sensitivity, and flexibility.
So how do I keep baby relaxed and nail the composition?
🎵 White noise and soft music: I always have gentle sounds playing in the background to mimic the womb and soothe baby’s nervous system.
🌡️ Warm environment: Babies lose heat quickly, so I keep the studio at a toasty 80–85°F during sessions. This helps them feel snuggly and safe, especially when they’re undressed.
🕰️ Baby-led pacing: Some babies fall right into a pose. Others need a little extra rocking, swaddling, or feeding first. I never rush—it’s always on baby’s time.
🧺 Smart posing workflow: I design my sessions to flow gently from one pose to another without moving baby too much. Less disruption = more relaxed baby = smoother compositions.
🧡 Safety + Art = Trust
This is where my heart really comes into it. Yes, I’m focused on composition for posing techniques with a newborn—but I’m always listening to your baby first. Some days, we capture 10 beautiful setups. Other days, baby only wants to be held. And that’s okay.
When I photograph your baby, I’m not just thinking like an artist—I’m thinking like a mother, a caregiver, a calming presence in the room. And that trust between us? It’s everything.
💬 What Parents Say
One dad told me after a session, “It felt like you’d done this a thousand times. You just knew what he needed before we even did.” That’s the kind of care I bring to every shoot.
Because at the end of the day, I want you to walk away with more than stunning photos. I want you to remember the experience as gentle, joyful, and completely stress-free.
📌 Up next: Post-Processing Tips—where I’ll show you how editing helps refine composition, enhance softness, and preserve every tiny, perfect detail you fell in love with. Let’s bring it all together. ✨
Post-Processing Tips to Enhance Composition ✨🖥️
Cropping and Adjusting Composition in Editing
So, we’ve planned the pose, nailed the light, and kept baby calm and cozy—but guess what? The artistry doesn’t stop when I click the shutter. Post-processing is where I fine-tune everything. It’s where a great shot becomes a frame-worthy portrait.
One of the biggest tools I use during editing is strategic cropping. Even with the most careful setup, tiny shifts happen—maybe baby stretches out or a prop sneaks into the frame. No problem! In editing, I make small adjustments to re-center, re-balance, and perfect the composition.
Here’s what I focus on during post:
🖼️ Cropping for Rule of Thirds
I might shift the frame slightly so baby’s eyes or hands land right where they should on the grid intersections. It subtly increases the emotional impact.
🪞 Straightening lines and symmetry
If the wrap edges or background lines feel off-kilter, I adjust them so everything flows harmoniously. Even a 2-degree tilt can change the whole mood.
📐 Framing refinement
Sometimes I crop in tighter to eliminate distractions, pulling all the attention to that tiny face or those perfect little fingers.
📷 Before & After: Composition Refinement Example
| Step | Purpose | Visual Impact |
|---|---|---|
| Crop tighter around baby | Remove background clutter | Baby feels closer, more intimate |
| Realign baby’s body angle | Enhance flow of pose | Composition feels smoother, more relaxed |
| Adjust wrap lines subtly | Create diagonal leading lines | Guides eye naturally toward the face |
Enhancing Colors and Textures for a Stunning Final Image 🎨
Once the composition is dialed in, I move on to the fun stuff—enhancing tones, textures, and softness. But I’ll be honest: my editing style is gentle, clean, and natural. I want your baby to look exactly like themselves—not like a digital doll.
Here’s what I tweak:
- Skin tones – I smooth out redness or blotchiness (totally normal for newborns!) without making the skin look plastic or overdone.
- Soft shadows – I enhance natural light falloff to add depth and dimension.
- Color harmony – I gently adjust background hues to keep the visual tone cohesive and soothing.
- Tiny details – I enhance eyelashes, little fingers, or the soft fuzz on their shoulders—those details you’ll cherish forever.
🧼 Think of editing like polishing a gemstone. The beauty’s already there—we’re just giving it a little shine.
Why Thoughtful Editing Matters for Composition
Great editing supports composition without overpowering it. It helps the emotional center of the image shine brighter. It removes distractions, elevates focus, and makes sure your baby—not the background or props—is the star.
And here’s something I really believe: editing isn’t about perfection—it’s about preservation. I want to preserve the calm, the closeness, the love in that moment. That’s what you’ll see on your wall for years to come.
💬 What Parents Say
One mama looked at her gallery and said, “It’s like the photos breathe. They’re soft, but they’re alive.” That’s the goal. That’s what post-processing, when done thoughtfully, can do.
🎯 So now that we’ve framed, posed, lit, and polished… what’s left? Just one thing: bringing it all together—and helping you understand why composition is the secret ingredient that turns your baby’s photo session into something truly unforgettable.
Let’s wrap this up with some heart and purpose. 💛
Conclusion: The Key Takeaways for Mastering Composition in Newborn Photography
You know what? When I first picked up a camera, I thought newborn photography was all about timing—catching that sleepy yawn or tiny stretch. But over the years, I’ve realized something deeper. It’s not just about capturing a moment—it’s about composing a memory. One that feels soft, balanced, meaningful… timeless.
From the first gentle pose to the final editing touch, composition for posing techniques with a newborn is what brings it all together. It’s how I make sure your baby’s story isn’t just seen—it’s felt. Every fold of a wrap, every pocket of shadow, every breath of negative space is chosen with care and intention.
Here’s what I hope you’ll take away:
💛 Composition is emotional
It’s not just about placement—it’s about how the image makes you feel. Calm. Connected. Close.
🧸 Your baby’s comfort comes first
No pose, prop, or photo is more important than their safety and peace.
📸 Details matter
From the angle of light to the tiniest crop, the small things build the big picture.
🎨 Editing is a finishing touch, not a fix
It’s about enhancing what’s already beautiful—not changing it.
🌿 Your family’s story is the centerpiece
And my role? To gently, beautifully, truthfully frame it.
💬 Thinking About Booking a Session?
If you’re an expecting mama or new parent searching for someone who sees the art and heart in every tiny detail—I’d be honored to be part of your journey.
Here at Artin Photography in beautiful Port Moody, I offer a calm, cozy studio experience where your baby is always the star. Whether you’re celebrating your first child or honoring your family’s cultural heritage, I’ll make sure your portraits are just as meaningful as they are magical.
📍 Serving families across the Lower Mainland—Vancouver, Coquitlam, Burnaby, Richmond, New Westminster, and Surrey.
📞 Call or text me at (778) 899-0537
🌐 Or visit artinphotography.ca to book your session
Because these moments? They’re fleeting. But the portraits we create together?
They’ll last a lifetime. 💛
Can’t wait to meet you and your little one.
— Mary
Artin Photography, Port Moody